Friday, September 6, 2019

Rudder 2...

Ok, so now we arrive at "dimple-pallooza"... Full disclosure: I ordered some kung-fu special tool for this procedure. I know that aircraft manufacturers have been using dimples for decades, but recently, a tool has been improved.

Recently, aircraft tool supply came out with a dimple die that makes substructure dimples fit much better. I bought a set, and the results are amazing. The windup is that the skins receive a regular dimple, and anything connected to the skin, receives a slightly deeper dimple to make it fit perfect...


The net result is nothing less than perfection..


Rudder 1

The rudder turned out to be the most challenging assembly so far. I know it will bet much more difficult, but the rudder was tough for a couple of different reasons. First, the rudder skin is only .016" thickness. That is ridiculously thin. The only real trouble area was the trailing edge. What a pain. Second; the rudder trailing edge: I am SERIOUSLY considering a different technique for the rudder trailing edge. IMHO, the van's approach is flawed. I will talk about that later...

Anywhoo....I will tell the story in how it was assembled. Honestly, this part is great engineering. First, you build the rudder spar. this was fairly easy, you add a couple of doubler plates, and rivet on some nut plates. The rib at the top houses the counterbalance weight. I was rather surprised how soon that rib was added to the spar, but it made sense later.  I alodined the parts I could fit in my "dip buckets".

The counterbalance rib was where I made a small mistake. I will illustrate that more later...


Better shots of the rudder horn, and the doublers. Note that I like to label the parts. It makes it easier for me to keep this stuff straight. Once you see the instructions, you will see why this makes sense. Well, to me anyways. I found that making some makeshift clamping devices, makes things so much easier. This is what I built. You might find something more efficient, but this worked for me!


Gratuitous diet coke shot here... The mistake is apparent in the counterbalance rib in this pic, but I will discuss later...


Eventually, the instructions lead you to this skeleton. You cleco it all together and match drill everything. You rivet the rudder horn at this time. Not gonna lie, I was kinda nervous riveting that assembly (the rudder horn...). It's very thick. But it all worked out. 


Once completed... (check out those sweet-ass new balance tennies!!) Pay no mind to the rivet on the left hand side of the nutplate. On the back side of the rudder horn, that rivet holds a zip-tie anchor that will eventually hold a nav-light wire?


As we progress.... The plans have you cleco the skins and the stiffeners to the assembly. Next, you match drill till you are blue in the face. On the serious, I am super proficient at drilling a hole, while holding a pair of cleco pliers, and a drill, in the same hand.... (trust me, it makes sense when you see it in person....


So, this is where things got slightly interesting. This little "R910" part, just didn't fit correctly. It took quite a bit of massaging to make it fit right. You can force parts into position with cleco's, but they will be a pain in the ass to rivet later when the clecos are removed. Initially, I thought the 910 was causing some of the "oil-canning" of the skins, while it was all cleco'd up. So I massaged it all into place so it fit right. The devil is in the details. I have found so far it is fits without forcing, your life gets a lot easier....


This was the gap I was trying to eliminate... (Between the vertical part on the right, and the horizontal 910 piece...)


The gap between the rudder horn (on the right) and the 910 piece. Eventually I just use a pair of seaming pliers to bend it all into position, and it helped. I'm glad I did this, because riveting this all together was really tough a little bit later...

To be continued.......


Wednesday, August 21, 2019

Vertical stab 3

Work continued on the vertical stab. With the skin riveted to the forward spar, it was time to insert the rear spar. The blue tape is a reminder not to rivet those holes.


I did not get a bunch of shots of the work on the rear spar. I can tell you this: I prefer to use the rivet run and bucking bar when working the 3/32" rivets. For some reason the squeezer was not producing flat shop ends on the rivets. The 3/32" rivets are so small, the 2X gun makes very short work of them. 


Behold!!! A finished vertical stab! Well, except for the fiberglass tip, that comes later....


Vertical Stab 2

Once the new forward vertical stab spar arrived, I commenced operations. I rebuilt the spar, and then assembled the vertical. At this point you can see how the ribs are riveted to the spar.


Here you can see the forward and rear spars.

I built this little cradle setup to facilitate the riveting portion of the skin. As previously stated, I cannot tell you how important it is to think through now you are going to work the piece, and also how you are going to support the piece while building. If the piece is moving around, it makes it tough to be precise with the rivet gun, and that means damage to your piece!
Essentially, you rivet the skin to the forward spar, then you cleco it all together, insert the rear spar, and rivet that in place. The engineering looks very solid, and well thought out. I was absolutely amazed how precise the parts were manufactured. The holes seem to line up, and everything fits together well.

You can see the AN426 flush head rivets here. 


Its pretty difficult to set the rivets and not damage the skin. Here is some of my tricks....
To make sure the skin doesn't get booger'd up, I just wrap some vinyl tape around the head of my flush set. Its just enough to prevent damage. I initially bought the fancy larger head flush set, with the rubber around it. I had terrible results with it, and because of it's size, ANY deviation from flush with the rivet gun is transferred into the piece that you are working.

The vinyl tape is just enough to assist keeping the gun in place, and prevent scuffing the skin.


Here is a shot of the roll of vinyl tape I ordered from Amazon. I'm guessing it got hot at some point? I have never seen a roll of tape like that.... 

Next trick I learned. If you look at the center of the pic, that is the forward vertical stab spar. It's reflecting the holes of the ribs, but you can see the rivets coming through for the vert stab skin. Note how the alclad coating is still intact on the skin, and not scratched to heck. 
I cut up a padded envelope and it provided just enough protection for the spar. Basically lay this under your bucking bar when it's sitting on an adjacent part. It's marvelous at preventing scratches. Also, when you drop the bucking bar, it prevents dents!!!


Tuesday, August 13, 2019

Vertical Stab....

So after the practice piece was finished, and the toolbox, I figured, why not try to build a real airplane part! You start with the "Empennage Kit"first. The first part of that kit is constructing the vertical stab. I wanted to try out my new spray gun and primer, so I primed a few parts.

You start with the forward spar on the vertical stab, and its very straightforward.

Then you move on to the main spar on the vertical stab. This is a little more involved. it has a .125" thick doubler that is riveted nearly the length of the spar. 

I realized quickly that half the battle in this new adventure is inventing ways to clamp your piece so you dont have to chase it all over your work surface. Here you can see the rudder hinges in place. 


Cleco it all together and you have something that resembles an airplane part. Alas, it all has to be disassembled to deburr and dimple.

Next you fit the skin, then match drill everything. I was shocked how tightly everything fit together. A true testament to the vans system. 

The only hiccup was that Van's sent a rib that was missing holes. I have read on VAF that it behooves one to read ten times and then drill. That is definitely the case. This is what the plans said....


And this is what I received...Hmmmmm....


Vans offered to send a new part, but I just clamped it into place and drilled the holes that didn't get punched. First world problems, and it was easy peasy...


Once finished, disassemble is all, deburr, dimple, and then begin the riveting. My first screw-up was on the forward spar. When driving AN470 rivets, make damn sure your bucking bar is on the rivet tail, and not the cleco next to it.  Lesson learned, and parts ordered. I had some Hawker trips for work, so this was a great place to pause for a few days while waiting for parts. 


The practice piece...

Ok, so Van's has you build a little practice piece before you start on the real thing. Technically, its VERY optional, but I highly recommend building both the tool box and the "mini-aileron?". The cool thing about the projects is that it gets you acquainted with working with sheet metal. I have a tremendous amount of experience working with wood, and a small amount of experience working with sheetmetal some years ago. I can tell you, that both of these projects humbled me.


It looks like a super simple piece to build, right? I suppose it is once you have the core skills, which I quickly figured out needed some work. 
Just getting my head wrapped around "dimpling" and "Countersinking" parts. With sheetmetal, the tolerances are so precise. Your mistakes are immediately apparent I quickly figured out, if you dont have the correct tool, STOP UNTIL YOU HAVE IT!!! I also learned that I hate "swivel head" flush sets for AN426 rivets. If the "swivel head flush set" isn't completely flat, it will "walk" all over your piece, and leave horrible marks... Mine went directly in the trash after the second rivet I attempted to set turned out like trash....


While this shot looks pretty decent, what you cant see are the imperfections. The spar/rib flange joint has a small gap between them due to an improper technique while riveting. I have learned that keeping material clamped together while riveting is a fine art. Luckily, some of the more experienced builders on VAF have shared their techniques.


Bask in all the glory that which is this practice piece. Tomorrow starts the real build....!

Friday, August 9, 2019

Primer Wars and Alodine...

Let me start this off by saying that there is a LOT of information out there about what to prime, how to prime, different types of primer, blah blah blah. There was so much info, I got information overload. When that happens, I just usually settle back in to  KISS mode (Keep It Simple Stupid).

I bought my grandfather's 172 that he sold in 1982 when he lost his medical. It was a 1973 model, that lived its entire life in the pacific northwest of the USA. Mind you it had been in a hangar all of its life, so I took that into consideration. I am building an airplane that will cost just shy of $200K, so of course I will put it in a hangar once it is built. How does this have anything to do with primer?!?!?! Well because I'm here to tell you, I went through every single inch of that 172, and there was not a speck of corrosion on it. And, there was not a speck of primer on the Alclad parts.

In the last few months, I've read all of the "primer wars" discussions on Van's AirForce. After disseminating all of the data, I am just not convinced that a plane in Oklahoma, built with Alclad aluminum, needs every single inch to be primed. If I lived in Florida? You bet... But I live in Oklahoma.... The wind up is this, some Van's builder spend way too much effort, time and money building this airplane they think their great grandchildren will fly. It ain't gonna happen. I'm building a 40 year airplane. anything beyond that is someone else's problem. If my little 172 had ZERO corrosion after 46 years on Alclad parts, I'm sure as hell not gonna waste my time priming that stuff....

So, if you are still reading, here is my setup. I figured that if I could Alodine the small parts that were non-alclad, I would be almost as good as priming. So here is what I put together. I bought 7 gallon buckets on Amazon. It came as a set of four, for like $78.00. I set it up and LABELED each bucket. I have the Alumaprep 33 acid etch in the first bucket. In the second, it's the distilled water wash. The third bucket is the Alodine, and the fourth is the distilled water wash.

It's convenient and it fits under my table. For the parts that aren't Alclad, I can use this setup.


When I have a part that is too big to fit in the Alodine setup, I built this little collapsible table out of PVC and chicken wire. I used a bunch of zip ties to make the chicken wire taught. The whole table took about an hour to build. It neatly stores behind my little storage shed when not in use. I just wanted something I could setup quickly, and then store out of sight when not needed. 

I bought some zinc chromate primer at the same place I bought the Alodine. I drove to their shop to avoid the CRAZY EXPENSIVE hazmat shipping charges. If you are near Oklahoma City, Big Mike will get you all set up at Advance Aircraft Coatings. CLICK HERE

.75" PVC, the top is glued together, and the legs are not. (I move it to the grass to spray)
 Note how nicely it stores away. Just pull it out when you have parts to shoot, then tuck it away when not in use. Easy peasy....Note the nerf ammo, my son is a crack shot...


The Build Space...

TOTAL WORKSHOP BUILD TIME : 30 hours

And we're off! After finally buying a bunch of tools as specified by vans, I took a little time to think about my build space. First, I live in Oklahoma, and it gets rather hot and humid in the summer. I am about to embark on a mission to build a $170K airplane. I realized that if I was sweating like hell, I wouldn't want to go out and work. I also would not be doing my best work, while sweating to death, or freezing in the winter.

I found this unit called a Mr. Cool DIY mini-split heat pump. For less than $1800, I was able to have my garage space air conditioned in the summer, and heated in the winter. The unit is whisper quiet, and I can control it with an app on my phone. I fly for a living, and the jet has internet, so I usually turn it on while I'm enroute headed home. By the time I arrive, my garage is the same temp as my house. I bought the 36K BTU unit, and it will run me out of a three car garage. My garage is insulated, and I have an insulated door, so that might make a difference.

Literally, all I had to do was run the wiring, and cut the holes. The lines are "pre-charged", so all you have to do is hook them up, open a few valves, and BAM! It's done. No need to call a tech out to your house. After a few months using this unit, I can tell you that $1800.00 is the best money I ever spent. I ordered a "hide-a-line" kit from amazon. I also ordered a kit to mount the outside unit to my wall. (money well spent) If you go this route, just make sure you order the LARGE diameter, not the small. The Mr. cool comes with 25 feet of lines, so the extra, I just coiled up behind the unit. Its fully insulated and ready to go.

I think the toughest part of the install was getting through the brick work. I was going to use a coring bit, but decided to just use a air chisel to carefully break the hole with a spade bit. It worked like a charm. Once I got the hole big enough, I filled the remaining areas with "caulk mortar" and it looks beautiful.

CLICK HERE FOR THE MR. COOL WEBSITE

The air handler...

The outside unit...

Once again, I cannot tell you how much I value this investment. I can patiently think through the build instruction manual, without sweat or freezing to death.

Next, I knew I needed a good work station. I went a little overboard, but this is what I ended up with. I did a decent amount of woodworking. I know that if you want a straight and true project, you have to start with a FLAT and TRUE surface. When working with wood, about the flattest surface you will come across is a solid core door. I found some new solid core doors at a clearance shop for $25 each... So, I stacked two solid core doors together, and started building this work station.  I added the casters (with brakes) and some electrical outlets on each side. The top is two layers of .75" plywood, that was glued together. I thought I would add the Kreg track system to clamp stuff down, but changed my mind.

It turns out, that most of the time when working with sheet metal, half the battle is just protecting what you are working on. So, I found some old carpet (scraps we took out of the hawker I fly...) and that's what I laid on top to protect my work. It works AWESOME.

You can see all the blue bins. They were old units we had when we had our business. They were bought from Uline, but available all over. They have proven to be VERY handy for storing everything from clamps to Cleco's.


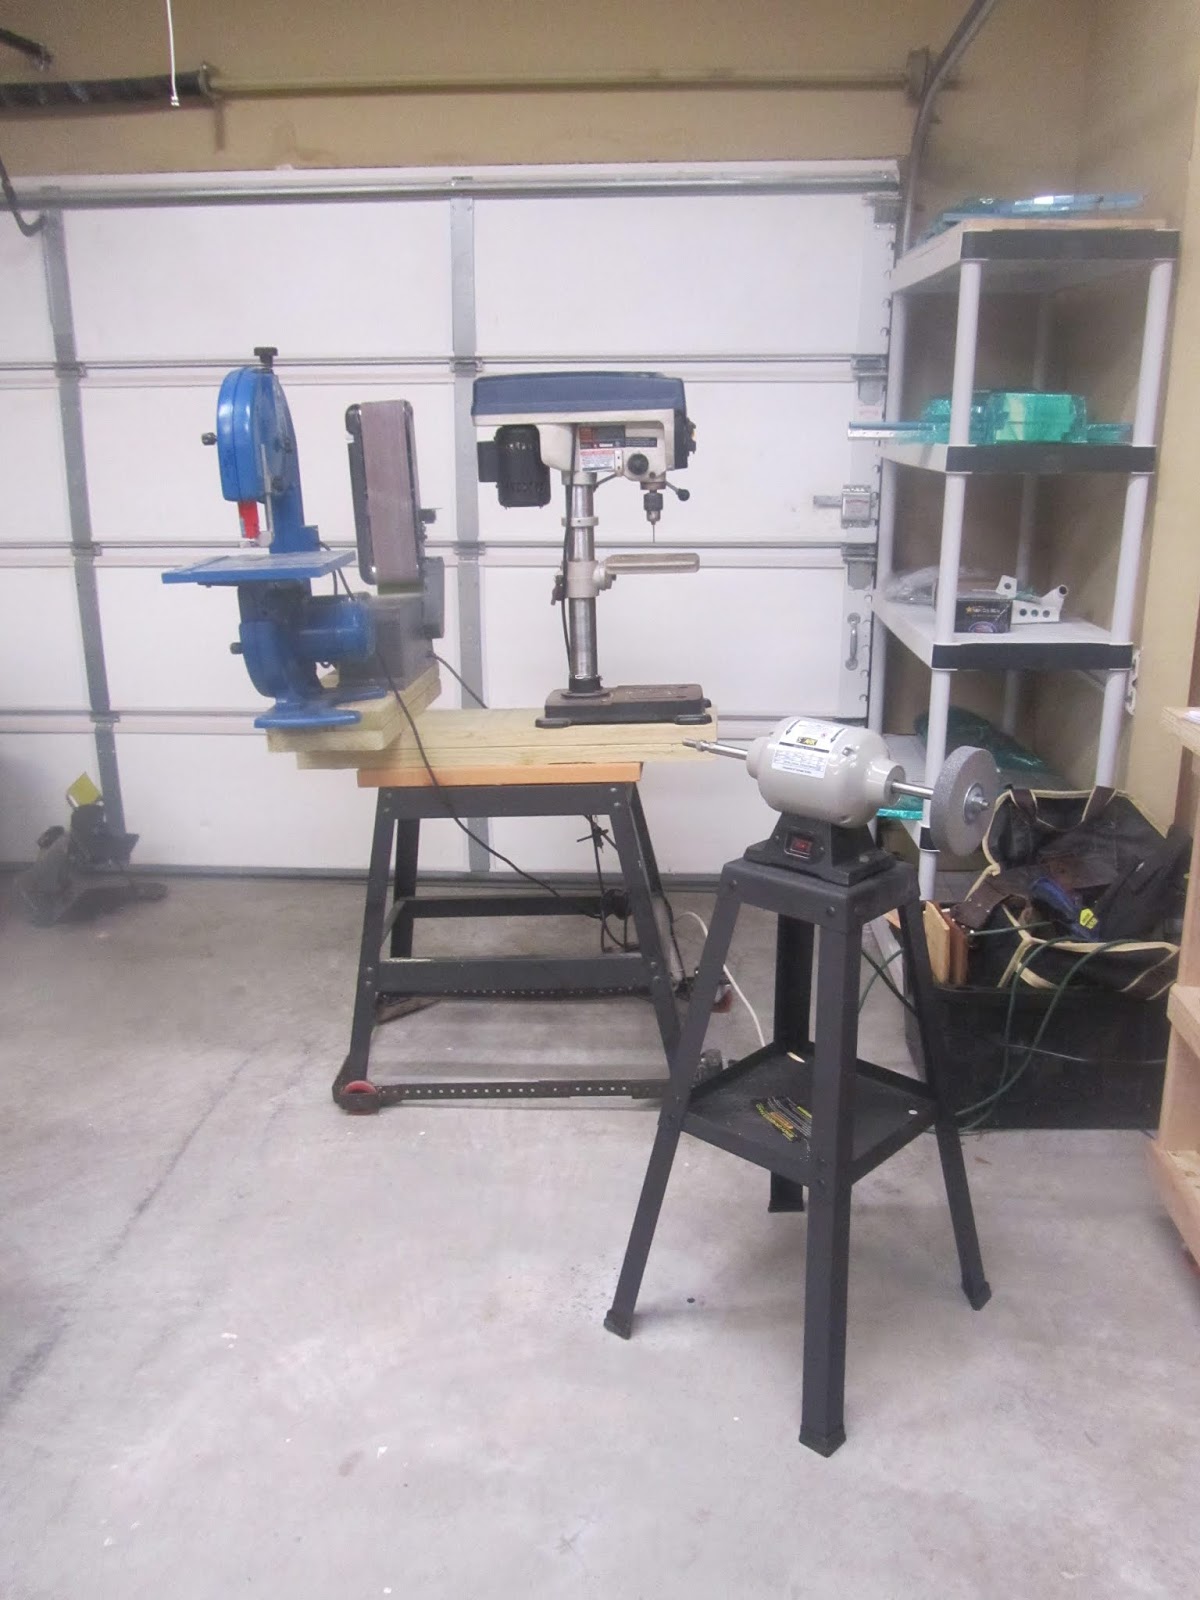
Next thing I needed was a large space to work on larger sub assemblies. Off to facebook marketplace we go! I found both of these tables for $150.00. They were bought from Uline, and they are as handy as a pocket on a shirt. I actually built a stand for the DRDT-2 (CLICK HERE FOR LINK) that sits in between the two tables.

On a side note, the DRDT-2 should be considered a required tool by Van's. Its absolutely incredible, and I cannot stress this enough--BUY THE DRDT-2 if you are thinking about building.


The tables...


A shot of how I set the DRDT-2 up.


Getting organized...


I suppose one of the more intimidating parts of the project was just getting organized.I'm not gonna lie, its intimidating to think of how large this project will be, so I'm trying to break this down into small chunks. The first chunk: have a system, and be organized.

 I do not deal with chaos very well, and with the complexity of building an airplane, I knew I had to have my "poop in a group". When the kit arrives, it comes with an inventory list. The inventory contains the location of each part and how they are organized. Note how this list contains each "bag" contents.


I decided to just keep most of the bags intact, and just label them on my organizer. This keeps it straight in my mind, your mileage may vary. 


Here is how I organized the rivets. I have found that I just walk over and take a small quantity of the rivets I need when working. Its CRAZY how they can scatter when spilled. Lesson learned. I now take a small plastic cup and cut in so it's about 3/4' deep. I put the rivets I'm working with in that. That way when it gets knocked over, its not a big mess. 

I organized by AN426, then AN470. When the next subkit arrives, I know I will have additional room for rivets and harware. 


As for the sheetmetal goods, I installed overhead racks in my garage several months ago. When we decided to build the RV14, I took 99% of the "crap" from the garage and placed it into our attic storage. Each of the storage racks is four by eight feet. I was able to stack most of the parts and still have access to most part numbers. 

Sorry for the blurry image...

I guess I didn't really describe my building space very well. but I'm building this airplane in a three car garage. We live in a housing development where having a shop is prohibited, so the garage it is!!! Here is the rest of the empennage components. It doesn't take up that much space really.


This is my tool station. I bought the tool base for $25 off craigslist. I used some 2x12's to form the extensions on the table. My thinking was that I don't have a ton of real estate in this garage, so if I can eliminate a few tool bases taking up space, then great. Also, this tool base has retractable wheels so I can easily move it around. 


I left me buffer/scotch-brite machine on a dedicated/easily movable base. My thinking is that this has to be moved around a lot to accommodate weird shaped sheet-metal parts.  The only problem thus far is that the speed of the buffer causes it to vibrate and move around slowly when running. I'm probably going to put a large weight on that bottom tray and softer rubber feet so it stays put when I have it running.